
I have been planning on cutting up my Kona card for a while now. It has been a few years since cutting up an older Kona card, and my lack of a system for that one (they were all thrown into a box) plus the addition of many new colors has made working with it an ongoing mess.
Earlier this year, I did a rough poll to see how others are organizing their color cards, and the answers were really helpful! I recapped some of those different styles and approaches in this newsletter if you’d like to see.
The systems I saw ranged wildly in terms of additional materials required, time investment to set up and resulting usability. I love being organized, and I love how being organized can help you work more efficiently, but it’s also important to weigh the options.
For me, I prefer a direction that requires the least amount of upfront time and extra materials to set up, with the most appropriate level of usability in the end. Not only am I often picking swatches to coordinate with collections and to use for projects, but I also like seeing all of the colors as a whole. Because of that, I like the idea of having a way to see all of the colors together, as well as to work with them individually. With two color cards, and I knew that I could keep one intact and I could cut the other one up. With just 1 card, it might be better to go in a different direction, maybe one like @modernhandcraft installed, which is impressive, but that would also require a lot of time and equipment to set up, as well as the physical space to put it. I’m not mad at a system that I can fold up and put away.
Instead, I was drawn toward @houseonhillroad’s approach which uses a special box to store the swatches. I think her box is one for storing embroidery floss that you could find at a craft store, but I also heard of others using tackle boxes and other things similar.
To be honest, all of this was fantasy thinking, because projects like these aren’t usually my favorite. They can be easy for me to dream about but not anything I’m quick to act on. There are too many other things I’d rather be doing and making! However, the stars aligned and I happened to find the perfect slotted container at the Dollar Store, when I was there rooting around for something else. I picked it up hoping it would be about the right size, and it turns out that it totally was! Yay! Plus, it was only $1. You can’t beat that.
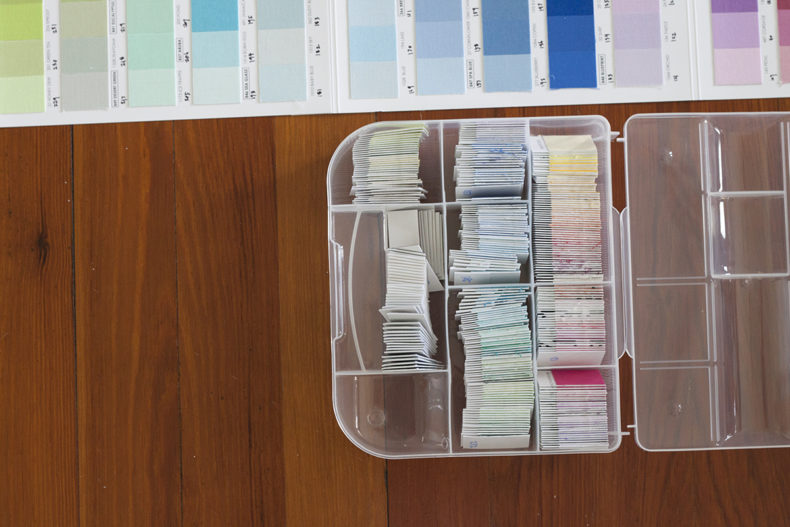
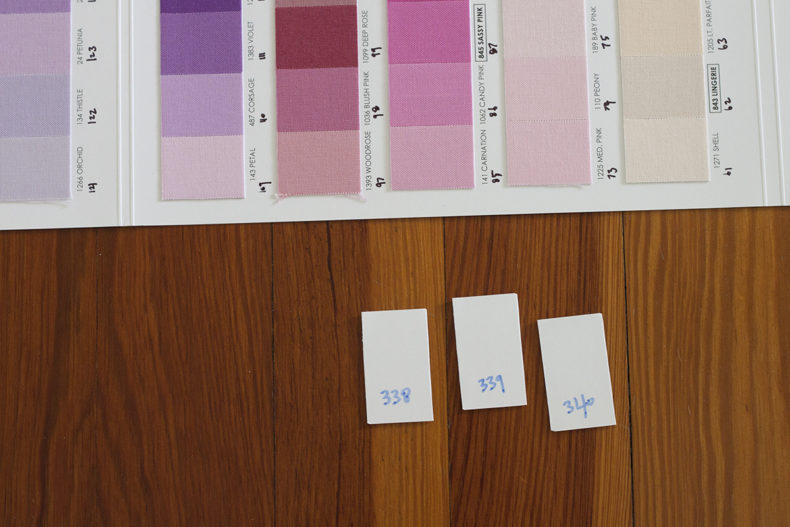
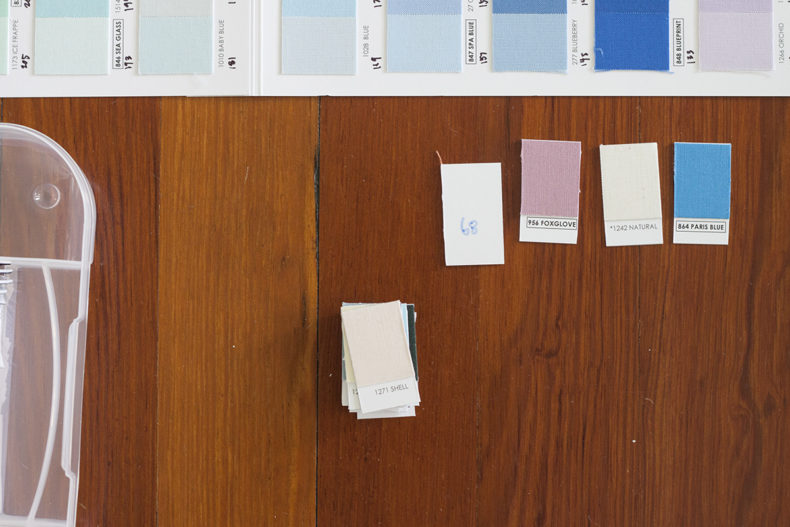
There were many good tips that I learned from others. For one, I numbered the back of each of my swatches as well as their position on the uncut card. This way, I can easily find what I’m looking for AND put it back when I’m done with it.
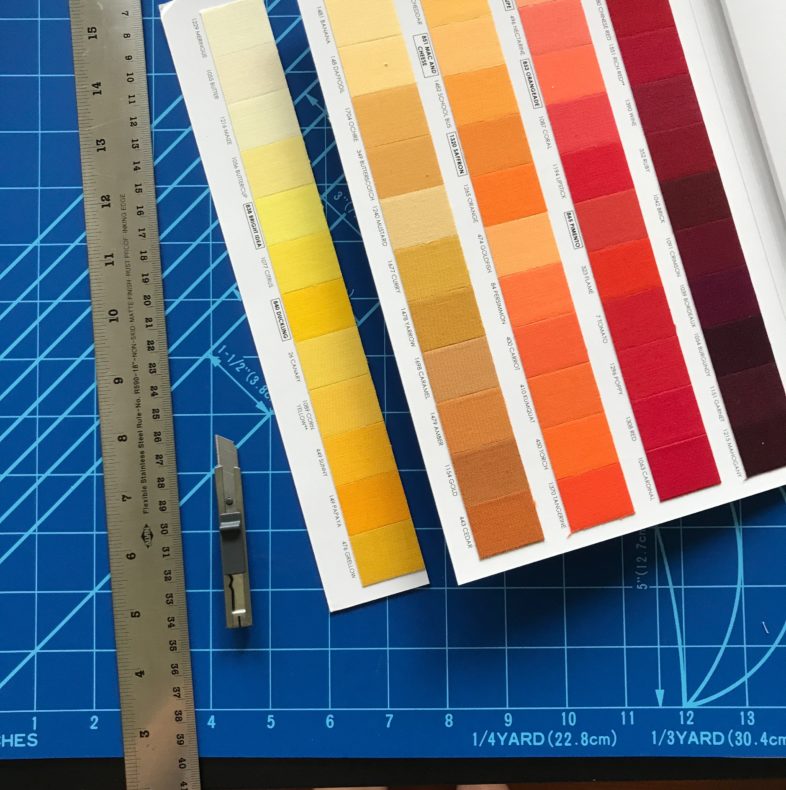
It really helps to cut the swatches to the same size. This was made easier by the fact that the newest Kona color card has standard sizes for the colors. Because of the layouts on some of the older cards, the swatches were different sizes. Having them all the same size makes everything easier to work with, and it makes them stack up so nicely.
This new system is already paying off in terms of time, mess and general convenience. Even though it took me a few hours to cut up and number the card and swatches, I’ve easily made that up in how easy it is to work with. I would totally make myself do this again with the release of a newer color card. Now having done it, I know how much easier it has made everything. It might not have been at the top of my list before, but it will be higher on the list moving forward.
I should note that I tried punching holes into a couple of the swatches. Also while at the Dollar Store, I nabbed some book rings, and I thought it could be nice to put the colors for certain projects into their own ring while I was working with them. I quickly discovered that you’d need either a stronger hole punch, a drill and/or more physical strength than I was willing and able to put into it, so I abandoned that direction after a couple of failed attempts. If I feel inspired, I can bust out my drill and add some holes in the future. For now, all is great.
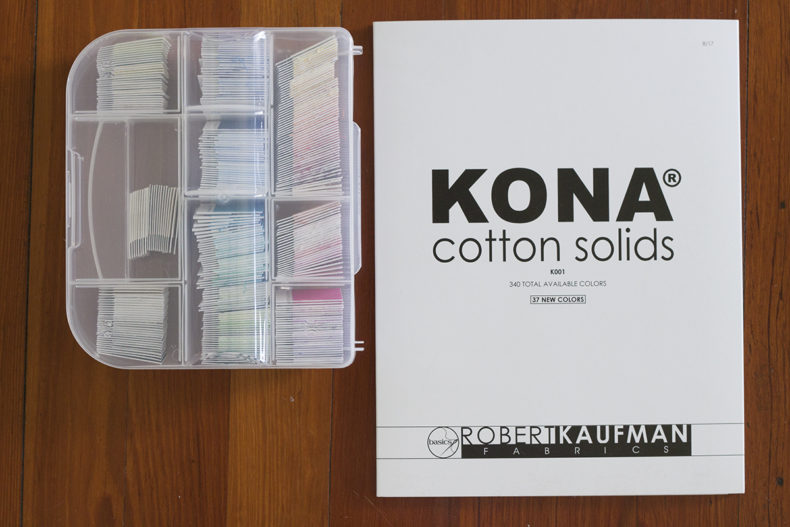
You can find a Kona color card on the google or at shops like ilovefabric and plenty of others. Just make sure to get the latest card with all 340 colors, and you’ll be set.
Hi Carolyn:
Thanks for doing the footwork (or should I say handwork?) on this so I can make my own little kit of color! Just to clarify…did you put the colors in an order you chose and then number them? And that’s the number you wrote on the back of each swatch and on the color card? Thanks again!
-Alane
Great question! I just numbered them as I cut them from the card, making #1 Meringue because I started from that side. I guess it might make more sense to start at the other end, so that Black and White are at the beginning. Doesn’t really matter I guess!
Drilling holes in your color cards, just the thought of it …. you are my idol (even more than before)!
Ha! And thanks! 🙂
When I got my Kona Color card I thought they were on paper(LOL). So when you put this together, did you actually mount them on to cardstock? If so, what weight of paper did you use and what glue did you use?
The full card actually does come on heavy cardstock. Maybe you have the card with just the newest colors? I think those are loose swatches once they’re cut away. You could probably mount them onto anything heavy.
I cut my Kona card up but also removed the bit of cardstock with the color name/number (after writing them on the back of each). I bought strong thin magnets from totalelement.com after explaining what I was trying to do this was the recommended magnet (2 packs) https://totalelement.com/collections/all-discs/products/1-4-x-1-32-inch-neodymium-rare-earth-disc-magnets-n48-200-pack
and these are the double sided sticky dots that attach them to the color swatches https://totalelement.com/collections/adhesives/products/1-4-inch-6-35-mm-3m-4920-vhb-double-sided-self-adhesive-foam-craft-sticker-dots-high-performance-acrylic-adhesive-350-pack
I found a 20.00 magnetic dry erase board at Costco though it’s barely large enough to store all the colors on so I’ll need to pick up a second board. Then I can arrange, rearrange and try different combinations mounted on the wall so I can mull them over.
I want to put into a box each row of colors. Where do I find one?
I found mine at the Dollar store, but I’ve seen good options at Hobby Lobby and other stores like it. Have fun!